Zensical Sandbox Install on Existing Ubuntu Web Server
Installing Zensical on Ubuntu — Sandbox Setup
This documents the sandbox installation of Zensical on ubuntu-web-vm as a potential replacement for the existing Jekyll/Chirpy production site at /var/www/websites/calabiyau19.github.io (pontifex.site).
Zensical is a modern static site generator built by the creators of Material for MkDocs. It is written in Rust and Python, MIT licensed, and actively developed. It uses zensical.toml as its native config format and docs/ as its content directory — both familiar concepts if you've used MkDocs or Jekyll.
Official documentation: zensical.org
Why Zensical
Jekyll is a mature but aging platform. MkDocs 1.x has been unmaintained since August 2024. Zensical is the forward-looking platform from the Material for MkDocs team — modern design, built-in dark mode, excellent code block handling, and actively developed.
Environment
- Server:
ubuntu-web-vm(192.168.1.72) - Management laptop:
lpt-HP(192.168.1.100) - Python version: 3.12.3 (pre-installed on Ubuntu 24.04)
- Shell on ubuntu-web-vm: Fish (via
falias from Bash login shell) - Sandbox location:
~/websites/zensical - Isolation method: Python virtual environment (
.venv) - Production site: unaffected — remains at
/var/www/websites/calabiyau19.github.io
Prerequisites
Verify Python is available:
Must return Python 3.12.3 or similar. If not present, install Python before proceeding.
Install the venv bootstrap package — required on Ubuntu 24.04 before a virtual environment can be created:
Without this, python3 -m venv fails with an ensurepip is not available error.
Create the Sandbox Directory
All subsequent steps happen inside this directory. The production Jekyll site at /var/www/websites/ is completely separate and unaffected.
Create the Virtual Environment
This creates a .venv/ subfolder containing a private, isolated Python and pip. Anything installed while this venv is active stays contained here — system Python is never touched. Deleting ~/websites/zensical later removes every trace cleanly.
Activate the Virtual Environment
Since ubuntu-web-vm uses Fish shell, the activation command differs from the standard Bash version shown in most documentation:
The Fish prompt may not visually indicate activation due to the custom Tide prompt. Verify it worked:
Must return /home/mark/websites/zensical/.venv/bin/python3. If it returns a system path, stop and re-run the activation command before proceeding.
Every new session requires these two commands before any Zensical work:
Install Zensical
Per the official Zensical documentation at zensical.org/docs/get-started/:
This installs Zensical and all required dependencies automatically. Confirmed installed version: zensical-0.0.46.
Verify the install:
Returns: 0.0.46
Initialize the Project
The . initializes the project in the current directory. Creates the following structure:
~/websites/zensical/
├─ .github/workflows/
│  └─ docs.yml          # GitHub Actions workflow for deployment (used later)
├─ .venv/               # Python virtual environment
├─ docs/
│  ├─ index.md          # Starter home page
│  └─ markdown.md       # Feature demonstration page
└─ zensical.toml        # Project configuration file
Verify:
Open Port 8000 in UFW
Zensical's built-in dev server defaults to port 8000. Add a UFW rule allowing access from the management laptop only:
Verify it is active:
Port 8000 should appear as ALLOW from 192.168.1.100.
Start the Dev Server — Initial Test
Zensical defaults to binding on localhost only. To make it reachable from the management laptop, bind to all interfaces explicitly:
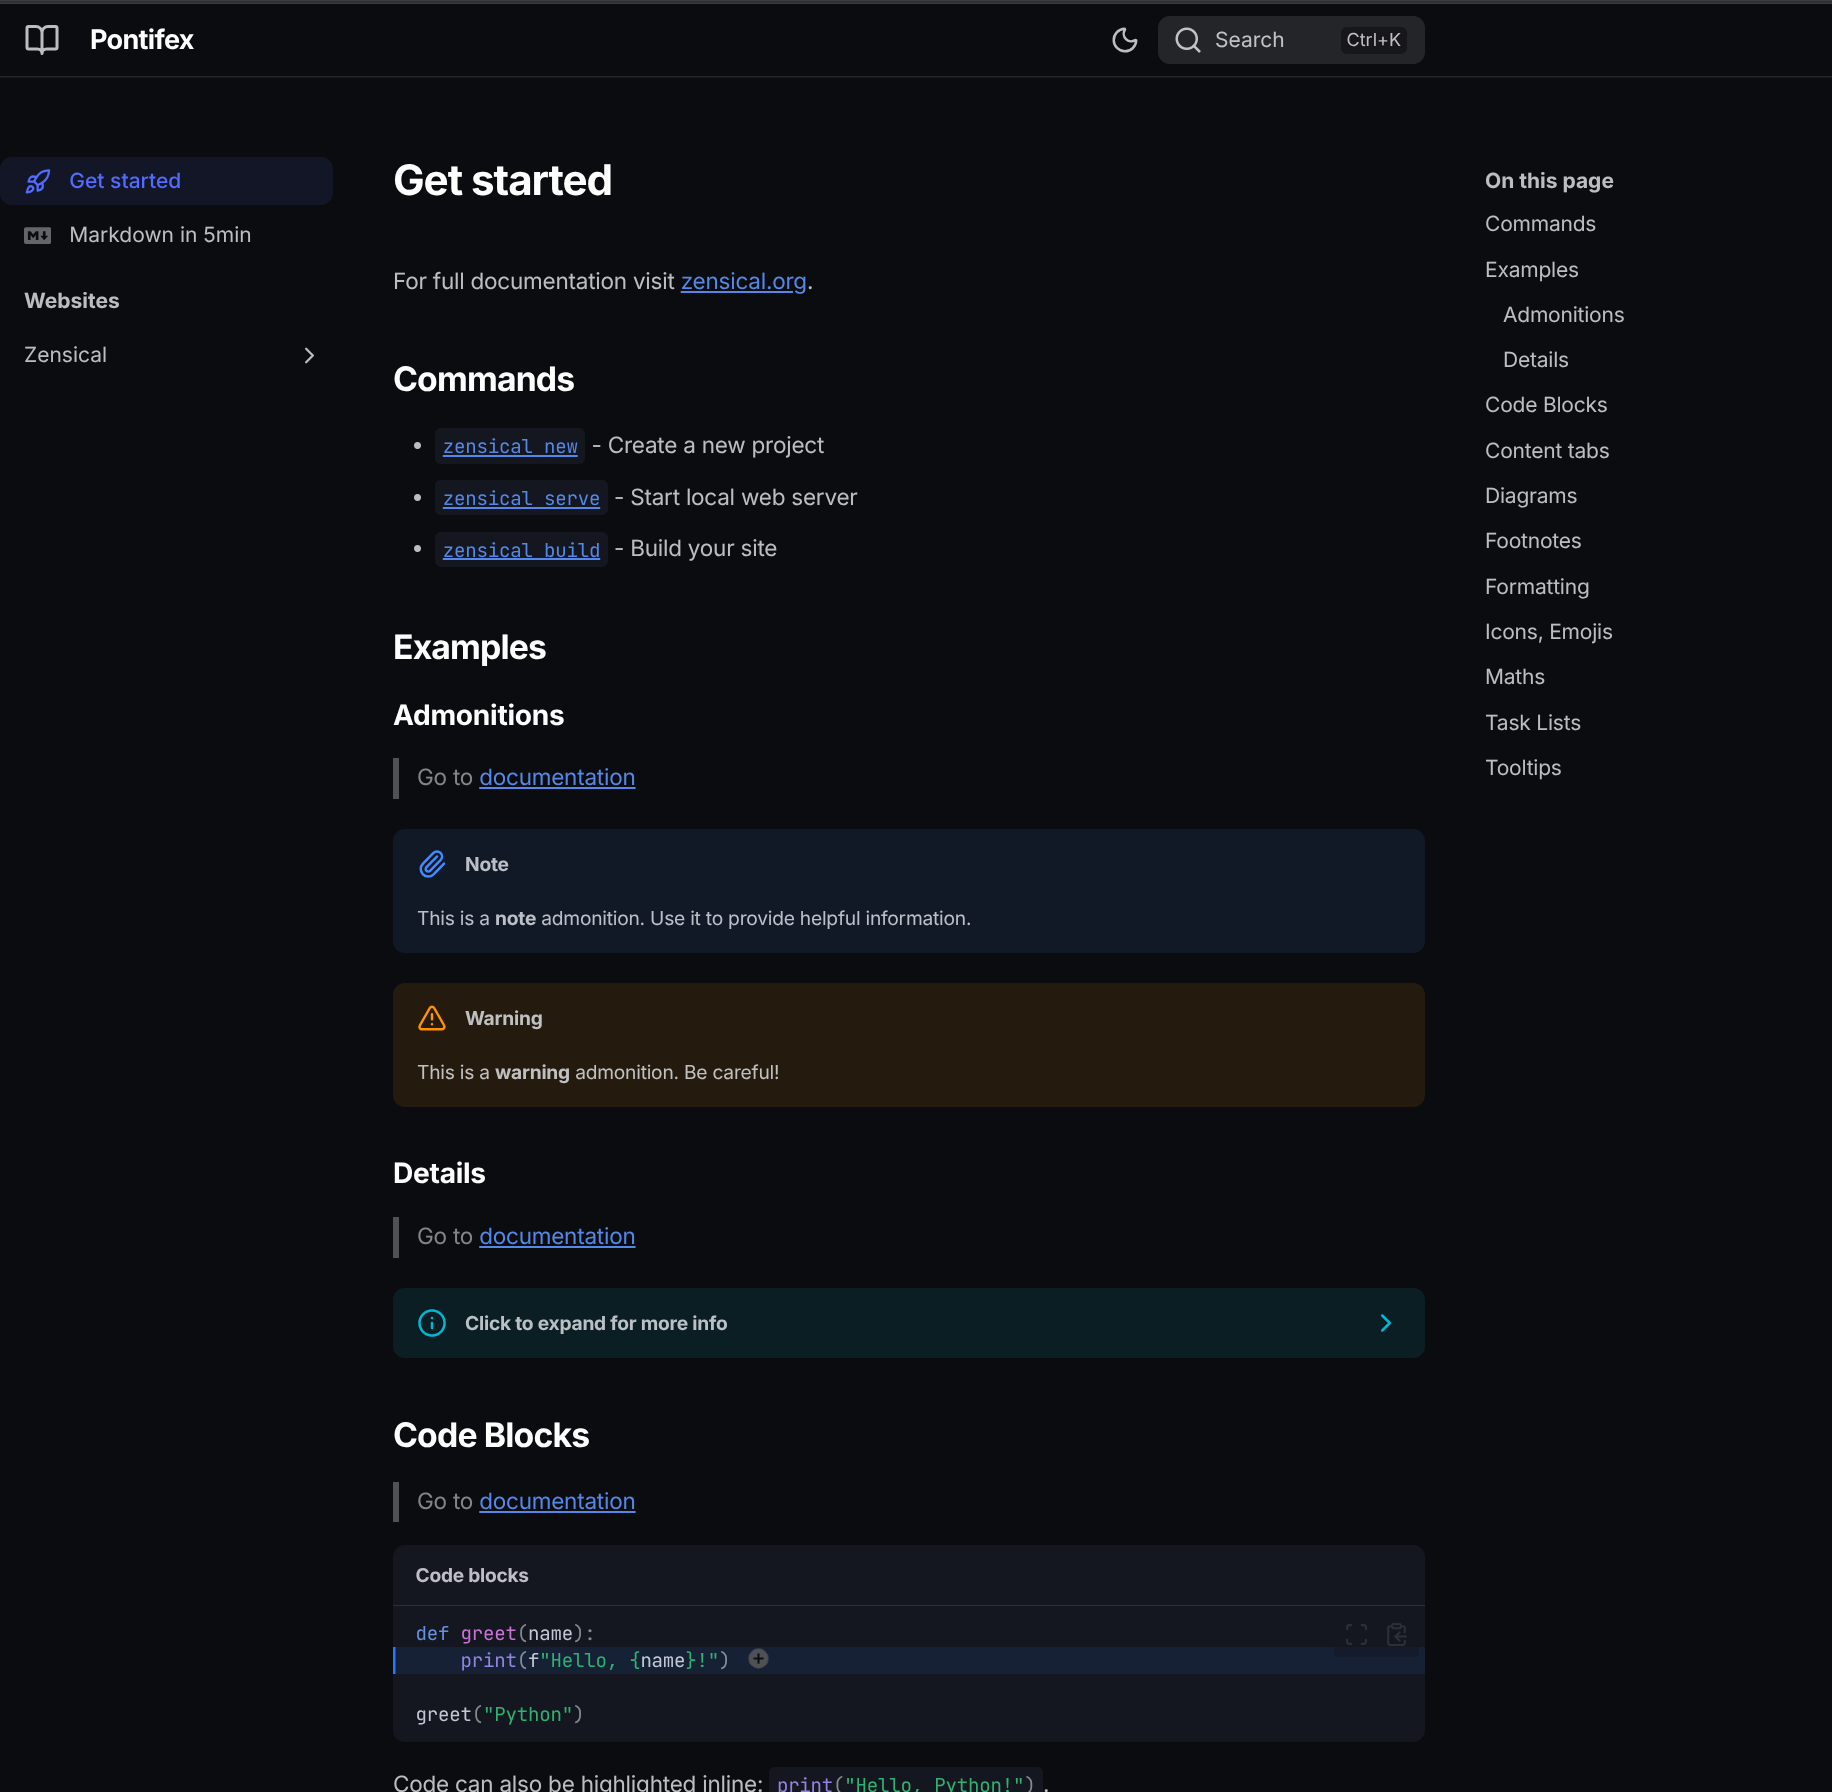
Browse to http://192.168.1.72:8000 from the management laptop. The default starter content should be visible with the three-column Material layout.
What You Get Out of the Box
Confirmed working with zero configuration:
- Clean three-column layout — left navigation, main content, right table of contents
- Built-in dark/light mode toggle (top right header)
- Search with
Ctrl+Kkeyboard shortcut - Syntax-highlighted code blocks with copy button
- Admonitions (Note, Warning, colored callout boxes)
- Content tabs, diagrams, footnotes, tooltips — all built in
Configure zensical.toml
With the server confirmed working, stop it with Ctrl+C and configure the project settings before continuing.
The default zensical.toml needs four values updated. Use these sed commands to make the changes without opening the file:
Set the site name:
Set the site description:
sed -i 's/site_description = "A new project generated from the default template project."/site_description = "Linux self-hosting documentation"/' ~/websites/zensical/zensical.toml
Set the site author:
sed -i 's/site_author = "<your name here>"/site_author = "calabiyau19"/' ~/websites/zensical/zensical.toml
Uncomment and set the site URL to the server's local IP for development:
sed -i 's|#site_url = "https://www.example.com/"|site_url = "http://192.168.1.72:8000"|' ~/websites/zensical/zensical.toml
Verify all four values before proceeding:
Expected output:
site_name = "Pontifex"
site_description = "Linux self-hosting documentation"
site_author = "calabiyau19"
site_url = "http://192.168.1.72:8000"
Make the Bind Address Persistent
Rather than passing --dev-addr=0.0.0.0:8000 every time, set it permanently in zensical.toml.
First confirm what line site_url is on:
Then insert dev_addr on the line immediately after it (substituting the actual line number if different from 30):
Verify placement:
Expected output — dev_addr must appear directly after site_url:
# documentation you should set this.
# Read more: https://zensical.org/docs/setup/basics/#site_url
site_url = "http://192.168.1.72:8000"
dev_addr = "0.0.0.0:8000"
# The copyright notice appears in the page footer and can contain an HTML
Start the Dev Server — Final
With dev_addr t in config, no flag is needed:
Browse to http://192.168.1.72:8000 from the management laptop. The header should now show Pontifex instead of Documentation.
Starting a New Session
The venv must be activated at the start of every session. The server does not persist across terminal sessions.
Current State
- Zensical
0.0.46installed and running athttp://192.168.1.72:8000 zensical.tomlconfigured: site name, description, author, local URL, persistent bind address- Starter content in place:
docs/index.mdanddocs/markdown.md - Ready for content migration from Jekyll
_posts/
Next Steps
- Explore theme configuration (colors, fonts, logo)
- Begin content migration from Jekyll/Chirpy (
_posts/→docs/) - Plan navigation structure by topic category
- Decide on GitHub Pages deployment approach
- Set up a systemd service or tmux session so
zensical servepersists across terminal sessions